Choosing Solar Outdoor Lighting for HOAs means balancing safety, appearance, maintenance, and long-term value across shared spaces. A path light that looks bright in a showroom may perform differently beneath mature trees or during a cloudy week. The right choice starts with the site: note where residents walk after dark, how much direct sunlight each area receives, and whether existing fixtures create dark gaps or glare.
Pay attention to more than a lamp’s advertised brightness. Review its measured light output, beam direction, operating time, battery replacement options, and warranty terms. A warm, controlled beam can make entrances and walkways easier to navigate without shining into bedroom windows. For parking areas and long paths, compare fixture spacing and coverage rather than relying on isolated product claims. A small test installation can reveal uneven light before the association commits to a larger project.
Keep upkeep realistic. Solar fixtures avoid new wiring in many settings, but panels still need sun and occasional cleaning. Batteries and components may need replacement over time. Not effortless. Ask vendors for product specifications, installation guidance, and clear service expectations, then compare those details with the HOA’s maintenance capacity and budget. Conditions vary from property to property, and even a carefully planned layout may need adjustment after residents use it. That is worth admitting early. A thoughtful selection process helps an HOA choose lighting that supports comfortable, consistent outdoor spaces rather than simply adding more fixtures.
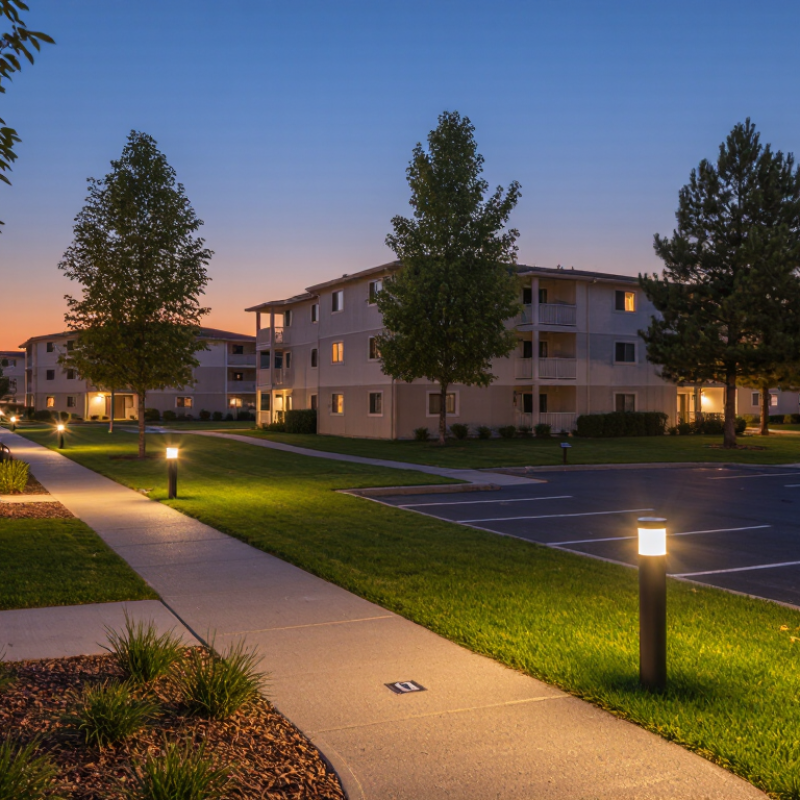
Assess HOA Lighting Needs, Site Conditions, and Community Standards
How to Choose Solar Outdoor Lighting for HOAs?
Assess HOA Lighting Needs, Site Conditions, and Community Standards
Start with a dusk walk through the community. Note dark stretches along paths, entry gates, stairs, and mail kiosks. Ask residents where glare or uneven light causes problems. Set a practical goal: clear wayfinding, not stadium-level brightness. Record community standards for fixture height, appearance, color temperature, and light spill before comparing products. DarkSky’s outdoor-lighting guidance recommends lighting that is useful, targeted, low-level, and controlled. Small details matter.
Next, check each proposed fixture’s sun exposure. A tree that is bare in winter may shade a panel in summer. Map shadows, nearby rooflines, and likely snow or debris buildup, then estimate local solar production with NREL’s PVWatts tool, which uses location-specific weather data. Check the fixture’s rated output and runtime together; a long winter night can expose weak sizing. The U.S. Department of Energy reports that LEDs use at least 75% less energy than incandescent lighting. Treat that as a technology benchmark, not a guarantee of solar runtime.
Tips: Test one fixture in a real location before approving a large order. Check its light at eye level, after dark, and after several cloudy days. Note what still feels off; the first layout may need adjustment.
Compare Solar Fixture Types, Brightness, and Battery Capacity
HOA managers should compare path lights, bollards, and area fixtures by coverage, not appearance alone. Path lights suit walkways and planting beds, while taller bollards spread light across shared paths. Area fixtures can cover parking edges, but poor aiming may send light into bedroom windows. Check lumens, beam angle, and mounting height together; a bright fixture with narrow optics can still leave dark gaps. Small numbers matter. The U.S. Department of Energy’s LED Lighting guidance says LEDs use at least 75% less energy and last up to 25 times longer than incandescent lighting. That lower load can help a solar fixture run longer, though actual performance depends on its panel and battery.
Compare battery capacity in watt-hours, calculated as volts multiplied by amp-hours. For example, a 3.2-volt, 10-amp-hour battery stores about 32 watt-hours before losses. Estimate nightly use from fixture watts and operating hours, then allow extra capacity for cloudy days, winter shade, and aging cells. A spec sheet can still mislead: advertised runtime may assume reduced brightness or ideal sunlight. Ask for runtime at the selected brightness, battery replacement details, and the test conditions behind the rating. In a shaded courtyard, a smaller fixture with a well-positioned panel may outperform a brighter model tucked beneath tree branches.
How to Choose Solar Outdoor Lighting for HOAs? — Compare Solar Fixture Types, Brightness, and Battery Capacity
| Fixture type |
Typical brightness |
Indicative battery capacity |
Common mounting height |
Best suited for |
HOA selection considerations |
| Pathway light or bollard |
50–200 lumens |
About 5–20 Wh (roughly 1.5–6 Ah at 3.2 V) |
1–3 ft (0.3–0.9 m) |
Walkways, garden paths, and low-level boundary guidance |
Choose shielded optics to reduce glare. Check spacing and path coverage; low-output fixtures are guidance lights, not substitutes for bright security lighting. |
| Wall-mounted lantern or sconce |
100–400 lumens |
About 10–30 Wh (roughly 3–9 Ah at 3.2 V) |
6–10 ft (1.8–3 m) |
Entry doors, garages, mail areas, and building perimeters |
Verify that the panel receives adequate direct sunlight and that the fixture’s beam covers the intended entrance without shining into nearby homes. |
| Solar post-top light |
200–800 lumens |
About 20–60 Wh (roughly 6–19 Ah at 3.2 V) |
6–12 ft (1.8–3.7 m) |
Courtyards, entrances, shared paths, and small parking areas |
Compare light distribution and mounting height as well as lumens. Confirm that the pole, fixture, and battery are suitable for local wind and weather conditions. |
| Solar area or parking-lot light |
1,000–5,000 lumens |
About 60–200 Wh (roughly 19–63 Ah at 3.2 V) |
12–25 ft (3.7–7.6 m) |
Parking bays, access roads, and larger common areas |
Use a lighting layout to check uniformity and glare. Confirm the stated output is maintained at the selected operating mode, not only the brief maximum setting. |
| Solar floodlight with motion sensor |
500–3,000 lumens when active |
About 20–100 Wh (roughly 6–31 Ah at 3.2 V) |
8–20 ft (2.4–6.1 m) |
Service gates, sheds, and infrequently used perimeter zones |
Check sensor range, aiming, and timeout settings. Motion-triggered high output can conserve energy, but frequent activation may shorten overnight operating time. |
Comparison note: These are indicative ranges for common solar fixture categories, not guaranteed specifications. Actual brightness, runtime, and battery size vary by design, operating mode, climate, and available sunlight. Compare battery energy in watt-hours (Wh) where possible; amp-hours (Ah) are only directly comparable when battery voltage is the same. For HOA projects, also review winter performance, replacement-battery availability, light distribution, glare control, and any local lighting requirements.
Evaluate Weather Resistance, Durability, and Operating Performance
For HOA pathways, parking areas, and entrance signs, weather resistance begins with the whole fixture, not just the solar panel. Check the IP rating: IP65 indicates dust protection and resistance to water jets, but it does not mean the light can be submerged. Inspect seals, cable entries, lens materials, and fasteners. Coastal salt, freeze-thaw cycles, and lawn sprinklers can expose weak points quickly. A rating on paper is not a winter test.
Durability also depends on the panel, battery, and mounting hardware. NREL’s 2013 review, “Photovoltaic Degradation Rates—An Analytical Review,” examined nearly 2,000 reported rates and found a median panel degradation rate of about 0.5% per year. That figure describes panels, not complete fixtures. Ask suppliers for battery replacement guidance, operating-temperature ranges, and warranty terms. Check that poles resist corrosion and bases stay stable in local wind and soil conditions. Small details matter.
Operating performance should be tested against real site conditions. Compare delivered light output, sensor behavior, and runtime after several cloudy days—not just a sunny-day specification. Walk the property at night and look for dark gaps near steps, gates, and changing path levels. Short winter days can reduce charging time, while cold temperatures may affect battery output. Record the expected nightly schedule and inspect a sample fixture through a full season. It may still underperform; adjust placement or spacing before approving a large installation.
Plan Fixture Placement, Installation, and Local Code Compliance
For an HOA, map walkways, entrances, stairs, and shared parking before choosing solar fixtures. Mark each location after dark; a daytime plan can miss shadows cast by trees or rooflines. Place lights to guide movement, not shine into bedroom windows or neighboring yards. Choose shielded, downward-facing fixtures and use the lowest practical brightness. A 2023 Science study by Kyba and colleagues analyzed more than 51,000 observations and estimated that night-sky brightness increased by roughly 7–10% annually. Controlled, targeted lighting helps limit glare and wasted illumination.
Tips: Test one fixture at each proposed location for several nights. Check winter shade, charging time, and whether the beam reaches the path without spilling across property lines. Keep spacing adjustable until the test works.
Before installation, review HOA design rules, local lighting ordinances, and any permit requirements with the relevant building department. Solar fixtures may avoid new wiring, but that does not automatically exempt a project from local rules. Confirm requirements for color temperature, operating hours, visibility near roads, and accessible routes. Record fixture locations and specifications for maintenance. A tidy layout can still leave a dark patch beside a gate, so inspect the actual route after installation and revise it.
Set Budget, Procurement Criteria, and Maintenance Practices
HOAs should budget for the full service life, not just the fixture price. Compare installed cost, expected battery replacement, warranty coverage, and the labor needed to reach each light. Ask suppliers to document winter runtime, rated brightness, battery chemistry, and performance after several cloudy days. A low bid can become expensive if paths need frequent repairs.
NREL’s review, “Photovoltaic Degradation Rates—An Analytical Review,” found a median solar-panel output decline of about 0.5% per year across nearly 2,000 reported rates. That figure describes panels, not batteries or complete fixtures, so it should not be treated as a maintenance forecast. Still, it supports checking panel condition and recording nighttime performance over time. Include seasonal inspections, lens cleaning, secure mounting, and prompt battery testing in the HOA’s annual plan. Some shaded corners may still underperform.
Tips: Test a sample fixture through a cloudy week before ordering in bulk. Photograph its location, note operating hours, and compare brightness at dusk and before dawn. Keep a small reserve for battery replacements; the exact timing varies with heat, usage, and product design. A spreadsheet helps, but it will not catch every dark patch.
How to Choose Solar Outdoor Lighting for HOAs: Budget, Procurement Criteria, and Maintenance
Use this sample scorecard to compare proposals. The percentages are suggested planning weights, not measured industry benchmarks; adjust them to your site, local requirements, and HOA priorities.
Prioritize safety and verified lighting performance, then compare lifecycle cost, durability, warranty coverage, and ease of maintenance. Request photometric data, battery-autonomy details, product ratings, and a clear maintenance plan when reviewing bids.
FAQS
Walk the property at dusk. Note dark stretches near gates, stairs, paths, and mail kiosks. Ask residents about glare and uneven lighting.
Look for tree shade, roof shadows, and places where snow or debris may cover panels. Seasonal changes matter. A bare winter tree may cast shade in summer.
Match the fixture to the space. Path lights suit walkways and planting beds; bollards can cover shared paths. Area fixtures may suit parking edges, but aim them away from bedroom windows.
No. Compare lumens, beam angle, and mounting height together. A bright, narrow beam can still leave dark gaps. Check light at eye level.
Multiply volts by amp-hours to estimate watt-hours. For example, a 3.2-volt, 10-amp-hour battery stores about 32 watt-hours before losses. Allow extra capacity for cloudy days and winter conditions.
Ask for runtime at the selected brightness, battery replacement guidance, and test conditions. Some advertised runtimes assume reduced brightness or ideal sunlight. Read the fine print.
It indicates dust protection and resistance to water jets, not submersion. Also inspect seals, cable entries, lenses, and fasteners. Ratings alone are not a winter test.
Install one fixture in a real location. Check it after dark and after several cloudy days, then inspect its runtime and sensor behavior. The first layout may still need adjustment.
Conclusion
Choosing Solar Outdoor Lighting for HOAs starts with understanding the community’s needs, including which areas require illumination, the desired level of brightness, and any established appearance standards. Site conditions such as sunlight exposure, shade, terrain, and nighttime activity can help determine suitable fixture styles, light output, and battery capacity. Comparing options with these factors in mind makes it easier to balance visibility, energy independence, and a consistent look across shared spaces.
A successful plan also considers durability, weather resistance, and expected operating performance throughout the year. HOAs should map fixture locations carefully, account for installation requirements, and check applicable local codes before work begins. Finally, setting a clear budget and procurement criteria helps guide purchasing decisions, while a practical maintenance plan can address cleaning, battery checks, and repairs. Together, these steps support a reliable lighting system that serves residents and fits the community’s long-term priorities.