
Solar Lighting Blog & Insights

Industry news, technical articles, and project insights from Solar Lighting International.

0%

Choosing Solar School Zone Flashing Beacons in 2026 requires more than comparing brightness, price, and panel size. A beacon beside a school entrance must remain visible during gray mornings, heavy rain, winter clouds, and late-afternoon glare. It must also communicate clearly to drivers, cyclists, crossing guards, and children. The best system balances optical performance, solar autonomy, battery durability, mounting height, flash timing, and straightforward maintenance.

David A. Harkey, a recognized traffic safety researcher, has emphasized a principle that guides responsible selection: “A safety treatment must address real road-user behavior, not ideal behavior.” That reminder matters. Drivers may miss a beacon when signs are crowded, vegetation blocks the view, or the flash pattern feels weak. Therefore, this guide examines sight distance, roadway speed, school schedules, pedestrian volumes, and local weather before recommending equipment. It also considers remote monitoring, tamper-resistant cabinets, battery replacement access, and documented installation practices.

Small details matter.

A six-inch panel can be ineffective at a long approach. An undersized battery may fail after several cloudy days. A powerful lamp can still be poorly positioned. These mistakes are easy to overlook, especially when a quotation appears attractive. The analysis should remain practical, evidence-based, and open to revision. Product testing, field observation, and maintenance records often reveal more than a brochure. No single Solar School Zone Flashing Beacons model fits every campus. The safest choice is the one that performs reliably where children actually cross.
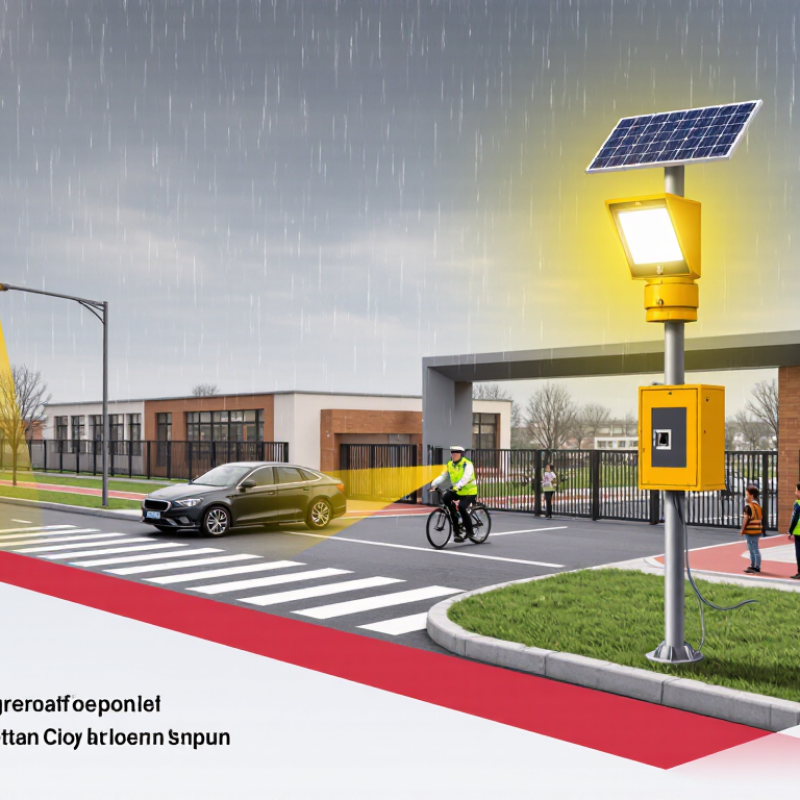
2026 How to Choose Solar School Zone Flashing Beacons

Define School-Zone Needs Using MUTCD 11th-Edition Beacon Criteria

Choosing a solar school-zone flashing beacon starts with the 2023 MUTCD, not a product brochure. Chapter 7 defines school-area traffic-control needs, while Chapter 4L addresses beacon operation. The S1-1 school warning sign should be supported by an engineering study, local school activity patterns, roadway speed, sight distance, and pedestrian exposure. Flashing yellow beacons must operate consistently, remain visible, and use timing that matches student arrival and dismissal periods. A beacon that flashes all day may reduce attention.

Field experience shows that placement often matters more than panel size. Check whether drivers can see the sign before reaching the decision point, especially near curves, parked vehicles, and tree branches. The FHWA 2023 MUTCD requires agencies to consider visibility, mounting, operation, and maintenance. It does not certify one solar design for every climate.

Solar sizing should use local hourly irradiance, not annual sunshine averages. NREL’s National Solar Radiation Database provides hourly solar-resource data for site assessment. Use the lowest seasonal production period, then account for battery aging, snow, dust, and several cloudy days. DOE’s 2024 Off-Grid Solar Guide emphasizes load estimation and storage resilience for standalone systems. I would specify more reserve than the spreadsheet suggests. Real school corridors are messier. Confirm nighttime darkness, winter charging, and beacon visibility through an on-site observation before approving the final design.

Specify 12-Inch Yellow LEDs and MUTCD-Compliant Flashing Patterns

For a 2026 solar school-zone beacon, specify 12-inch yellow LED signal heads, not smaller roadside lamps. The larger lens gives drivers a clearer visual target near crosswalks, especially during rain, glare, or early morning darkness. The FHWA Manual on Uniform Traffic Control Devices (MUTCD), 11th Edition, requires flashing beacon equipment and operation to follow approved traffic-control principles. Where two yellow indications are used, they should flash alternately at approximately 50 to 60 flashes per minute. The pattern must be obvious, consistent, and easy to recognize from a safe stopping distance.

NHTSA reported 7,522 pedestrian deaths in 2022, reinforcing why school-zone visibility deserves careful engineering. Select LEDs with measured intensity, sealed housings, and stable performance across temperature changes. Solar sizing should use local winter sunlight, battery reserve, and the beacon’s daily operating schedule. A panel that works in July may fail during several cloudy weeks. That mistake is easy to miss. Confirm the controller’s flash pattern, night dimming behavior, and activation timing during field testing. Verify the sign placement and mounting height against the current MUTCD edition and local engineering requirements. Specifications should also document battery autonomy, charging performance, and maintenance access. I would not approve a system from paperwork alone; observing the beacon beside a real school crossing can reveal glare, weak contrast, or confusing timing.

2026 How to Choose Solar School Zone Flashing Beacons - Specify 12-Inch Yellow LEDs and MUTCD-Compliant Flashing Patterns
Selection Dimension Recommended Specification Compliance or Design Basis Purchasing and Verification Notes
Primary Application School-zone speed-limit warning, school crossing, or other school-area traffic-control application approved by the road authority. Use only where an engineering study, traffic-control plan, or jurisdictional policy supports a flashing beacon. Confirm the exact application before ordering the sign legend, beacon location, and operating schedule.
Beacon Diameter 12-inch circular beacon heads for each required indication. A 12-inch indication provides a commonly specified size for school-zone and roadway warning installations; the governing agency may require a larger size based on roadway conditions. Verify the required size against the adopted edition of the Manual on Uniform Traffic Control Devices and local agency standards.
LED Indication Color Yellow LED indications with a clear, uniform signal appearance across the full face. Flashing yellow is used for warning applications. The indication should meet applicable photometric, color, and signal-head requirements. Request photometric documentation, operating-temperature ratings, and confirmation that the lens and LEDs are intended for traffic-control use.
LED Technology High-intensity LED array with sealed optical components, regulated current, and low power consumption. LEDs normally reduce energy use and maintenance compared with incandescent sources, but performance depends on optical design and thermal management. Check lumen maintenance, surge protection, ingress protection, and replacement procedures rather than evaluating LED wattage alone.
Flashing Rate 50 to 60 flashes per minute, with each flash duration approximately equal to the dark interval. This is the typical MUTCD flashing-beacon rate range for traffic-control applications. Require a factory-set or lockable controller and verify the actual rate with a calibrated timing test during commissioning.
Flashing Sequence For a two-beacon assembly, use alternating operation: one yellow beacon on while the other is off. Alternating flashes are used for paired warning beacons where the applicable MUTCD figure and agency plan call for that arrangement. Do not accept simultaneous flashing unless the approved traffic-control plan specifically permits it.
Flash Synchronization Controller-based synchronization for all beacons serving the same school-zone approach. Synchronization improves consistency and reduces conflicting visual patterns between adjacent assemblies. Specify hardwired or approved wireless synchronization, fail-safe restart behavior, and a documented synchronization test.
Operating Schedule Time-of-day or calendar-based operation limited to approved school arrival, dismissal, crossing, or special-event periods. A schedule reduces unnecessary battery use while maintaining the intended warning function. Use a lockable astronomical or programmable controller where appropriate, with daylight-saving and holiday schedule management.
Sign and Beacon Placement Install the beacon assembly at the location, height, lateral offset, and orientation shown in the approved traffic-control plan. Visibility, mounting, and placement must follow the applicable MUTCD provisions and the adopting agency's standards. Confirm sight distance from each approach, avoid foliage and utility obstructions, and document the final aiming angle.
Solar Panel Sizing Use a photovoltaic panel sized from a site-specific energy calculation; a preliminary design may target approximately 80 to 150 watts for a low-power two-beacon system. The correct size depends on beacon wattage, flash schedule, local solar resource, panel orientation, shading, temperature, and required autonomy. Require a month-by-month energy model using the site's worst solar conditions instead of selecting a panel solely by nominal wattage.
Battery Capacity Use a deep-cycle battery bank with a design target of at least 5 to 7 days of autonomy after a full charge. Autonomy is a project requirement, not a universal MUTCD value. Cold weather, battery chemistry, depth of discharge, and cloudy periods must be included in the calculation. Specify low-temperature charging protection, battery-management functions where applicable, temperature compensation, and an accessible lockable enclosure.
Charge Controller Solar charge controller with overcharge, over-discharge, reverse-polarity, short-circuit, and temperature protection. Protection functions help preserve battery life and maintain reliable beacon operation. Check controller voltage compatibility, maximum photovoltaic input, load-output rating, diagnostic indicators, and event logging.
Energy Management Low-voltage disconnect, battery-state monitoring, automatic dawn or schedule control, and a controlled restart after power recovery. Energy management prevents deep discharge and supports predictable operation during extended low-sun conditions. Require an accessible test mode that does not permanently alter the programmed flash pattern or operating schedule.
Weather and Enclosure Protection Outdoor-rated, corrosion-resistant enclosures with sealed cable entries and drainage designed for the installation environment. Protection against water, dust, condensation, salt, and temperature extremes is essential for roadside equipment. Specify an appropriate enclosure ingress-protection rating, UV-resistant materials, stainless or corrosion-resistant hardware, and tamper-resistant locks.
Nighttime Visibility Maintain clear yellow visibility at the required approach distance without excessive glare or confusing reflections. The installation must provide adequate conspicuity while remaining consistent with traffic-control visibility requirements. Conduct daytime and nighttime field checks from every approach lane, including checks during rain or other expected weather conditions.
Backup and Fault Behavior Controller should detect low battery, charging failure, LED failure, and schedule or communication faults where monitoring is provided. Fault reporting supports preventive maintenance and reduces the time that an inoperative beacon remains unnoticed. Define whether faults generate a local indicator, remote notification, maintenance record, or service call.
Maintenance Access Provide safe ground-level or controlled-access service points for battery inspection, controller testing, cleaning, and firmware or schedule updates. Routine inspection is needed to preserve visibility, charging performance, and reliable operation. Include a maintenance schedule covering panel cleaning, hardware checks, battery testing, flash-rate verification, and vegetation clearance.
Acceptance Testing Before activation, verify sign placement, beacon color, 12-inch diameter, flash rate, alternating sequence, schedule, solar charging, battery autonomy calculation, and nighttime visibility. Acceptance should demonstrate conformity with the approved plans, applicable MUTCD provisions, and local specifications. Keep commissioning records, photographs, controller settings, test results, wiring diagrams, and maintenance instructions with the project file.
Final Approval Obtain written approval from the responsible traffic engineer, roadway owner, or public agency before placing the system into service. Local adoption, engineering judgment, and project-specific requirements control the final installation. Use this table as a specification checklist, not as a substitute for the adopted MUTCD, engineering plans, permits, or agency review.
Specification note: Final beacon size, location, flash pattern, operating schedule, solar-battery capacity, and mounting details must be confirmed against the current MUTCD provisions adopted by the responsible jurisdiction and the approved site-specific traffic-control plan.

Size Solar Panels and Batteries for 3–5 Days of Winter Autonomy

2026 How to Choose Solar School Zone Flashing Beacons

Winter punishes averages. Measure the beacon’s real load, including the controller, flash pattern, heater, and communication equipment. A field example using 24 watts continuously requires 576 watt-hours daily. Three days require 1.73 kilowatt-hours, while five days require 2.88 kilowatt-hours. Divide that energy by 80% battery depth of discharge and 85% conversion efficiency. The resulting nominal battery is about 4.24 kilowatt-hours for five-day autonomy. This is a calculation, not a universal specification.

Use hourly winter data from the National Renewable Energy Laboratory’s National Solar Radiation Database, rather than annual sunlight averages. If the site receives three winter peak-sun-hours daily, a 75% system derating should cover wiring, temperature, snow, dust, and controller losses. Replacing 2.88 kilowatt-hours after a five-day outage within three clear days would require roughly 1.28 kilowatts of panels. Add practical reserve, and a 1.5–1.7 kilowatt array becomes more defensible. NREL’s PVWatts documentation supports site-specific loss modeling, while NOAA’s 1991–2020 Climate Normals help assess snow and temperature conditions.

1.5–1.7 kilowatt array Add practical reserve for a more defensible system design.

Do not hide the weak assumptions. A north-facing sign, shaded pole, or snow-covered module can defeat a perfect spreadsheet. Check winter tilt, battery temperature limits, and low-voltage shutdown settings during commissioning. The Federal Highway Administration’s traffic-control guidance also reinforces clear visibility and reliable operation near schools. I would record ten days of actual current data before final sizing. It takes longer. It prevents a polished mistake.

Verify IP65 Enclosures, 100,000-Hour LEDs, and -30°C to 50°C Operation

Choosing solar school zone flashing beacons starts with the enclosure. An IP65 rating means the housing is dust-tight and protected against water jets. It does not mean the unit can survive flooding or careless installation. Look for a gasketed door, sealed cable glands, and stainless mounting hardware. Rain finds weak seals. During site checks, inspect for condensation behind the lens, especially after cold nights and warm afternoons.

The LED specification deserves careful reading. A 100,000-hour rating usually describes expected LED life under controlled conditions, not the complete beacon. Heat, voltage changes, and dirty lenses can reduce real-world performance. Select high-intensity LEDs with clear optical separation between the two flashing faces. Check whether the manufacturer provides photometric test data and a replacement procedure. Ratings are not guarantees.

The operating range should cover local weather with room to spare. Verify documented operation from -30°C to 50°C, including the solar controller, battery, display, and LED module. Cold temperatures can reduce charging efficiency, while prolonged heat accelerates battery aging. A shaded pole location may protect the battery, but nearby trees can limit winter sunlight. Ask for temperature-cycle testing, battery capacity data, and service records from comparable installations. I would not rely on a catalog line alone; field conditions are less tidy than laboratory conditions. A small inspection mistake can matter when children approach the crossing.

2026 How to Choose Solar School Zone Flashing Beacons

Verify IP65 enclosures, 100,000-hour LEDs, and reliable operation from −30°C to 50°C.

The chart summarizes three measurable selection benchmarks: IP65 ingress protection, an LED service-life rating of 100,000 hours, and an 80°C operating-temperature span from −30°C to 50°C. LED life is shown in thousands of hours, while the temperature value represents the full rated range.

Compare NEMA Compliance, Warranties, Lifecycle Costs, and Visibility Data

Choosing a solar school-zone flashing beacon requires more than counting LEDs. NEMA TS 4 addresses flashing-beacon hardware, environmental resistance, and electrical performance. Verify current certification, enclosure ratings, battery protection, and controller documentation. The 11th Edition of the FHWA MUTCD also provides placement and operation requirements for school-zone warning devices. A compliant enclosure cannot fix poor sight distance.

Visibility needs measured evidence. FHWA traffic-control research reports that LED signal technology can reduce energy use by roughly 80–90% compared with incandescent sources. However, brighter is not always safer. Ask for daytime, nighttime, rain, and glare test results, including detection distance and flash uniformity. A beacon should remain visible behind a windshield at the approach speed. Field observations matter. Laboratory numbers can look perfect.

Warranty terms reveal lifecycle risk. Compare battery replacement intervals, photovoltaic output guarantees, controller coverage, corrosion protection, and labor exclusions. Calculate five- and ten-year costs, not only purchase price. Include snow removal, tree shading, battery disposal, and truck access. NEMA compliance and a long warranty are useful, but neither guarantees performance in a shaded northern corridor. I would document seasonal voltage readings and missed flashes during inspections. That practice is imperfect, yet real operating data often exposes assumptions that a brochure misses.

FAQS

What should guide the selection of a solar school-zone beacon?

Start with current traffic-control guidance, not a product brochure. Review school schedules, roadway speed, sight distance, and pedestrian exposure. The beacon should support the appropriate school warning sign. Local conditions decide the final design.

When should the beacon operate?

It should flash during student arrival and dismissal periods. All-day flashing may reduce driver attention. Match the schedule to actual school activity. Recheck the timing after seasonal schedule changes.

Where should a school-zone beacon be placed?

Drivers must see the sign before making a decision. Check curves, parked vehicles, trees, and roadside clutter. Observe the approach from a moving vehicle. A large solar panel cannot repair poor placement.

How should solar capacity be calculated?

Use local hourly sunlight data instead of annual sunshine averages. Design for the lowest seasonal production period. Include battery aging, snow, dust, and several cloudy days. I would add extra reserve.

What field conditions deserve special attention?

Inspect winter charging, nighttime darkness, and windshield visibility. Look for shadows from branches and nearby buildings. Record conditions during actual school hours. Spreadsheets miss messy corridors.

What hardware information should buyers verify?

Request enclosure ratings, battery protection, controller documents, and current compliance records. Confirm resistance to weather and electrical stress. Check whether maintenance access is practical. Documentation can still be incomplete.

How should beacon visibility be evaluated?

Ask for daytime, nighttime, rain, and glare test results. Review detection distance and flash uniformity. Test visibility at the roadway’s approach speed. Brighter is not always safer.

How can lifecycle costs be compared?

Calculate five-year and ten-year costs, not only the purchase price. Include battery replacement, snow removal, tree trimming, and service access. Review warranty exclusions and labor coverage. Real costs often surprise planners.

Conclusion

Choosing Solar School Zone Flashing Beacons begins with clearly defining the school-zone safety requirements and reviewing the applicable MUTCD 11th-Edition beacon criteria. Select systems with 12-inch yellow LED modules and compliant flashing patterns that provide strong visibility without creating confusion for drivers, pedestrians, or nearby residents. Solar sizing is equally important: panels and batteries should be calculated for local sunlight conditions, seasonal usage, and at least 3–5 days of winter autonomy to maintain reliable operation during cloudy weather.

For long-term performance, evaluate enclosures rated at least IP65, LEDs designed for approximately 100,000 hours of service, and operating temperatures from -30°C to 50°C. Compare NEMA compliance, warranty coverage, maintenance requirements, lifecycle costs, and documented visibility data rather than focusing only on the initial purchase price. A well-matched beacon should combine dependable energy storage, durable construction, clear nighttime visibility, and practical installation features to support consistent school-zone warnings throughout the year.

Ethan Caldwell

Ethan Caldwell

Ethan Caldwell is a seasoned marketing professional and a trusted voice behind the company’s expert blog. With a strong understanding of customer needs, market trends, and product applications, Ethan transforms complex information into clear, practical, and engaging content. His writing helps......