Industry news, technical articles, and project insights from Solar Lighting International.
Pedestrian safety is becoming harder to manage as roads grow busier and visibility changes throughout the day. The National Highway Traffic Safety Administration reported 7,522 pedestrian deaths in the United States in 2022. That figure shows why crossing visibility deserves more than a bright sign and good intentions. Solar Powered Crosswalk Warning Lights can provide noticeable flashing guidance without trenching, grid connections, or costly electrical extensions. However, performance depends on more than the panel’s wattage.
The Federal Highway Administration identifies Rectangular Rapid-Flashing Beacons as an effective visibility treatment when properly placed and operated. Its safety research found substantially higher driver-yielding rates after beacon installation. The exact result varies by road design, traffic speed, and local behavior. That matters. A product that works beside a quiet school zone may struggle near a wide, fast arterial road. The FHWA Manual on Uniform Traffic Control Devices also emphasizes correct placement, visibility, and operational consistency.
This guide examines seven practical factors, including solar exposure, battery capacity, flash intensity, detection controls, weather resistance, maintenance access, and compliance documentation. NREL research on photovoltaic systems shows that output gradually declines over time, while dust, shade, and temperature can reduce daily performance further. A cloudy week may expose weak storage design. No checklist is perfect. Yet careful selection can prevent dark displays, short nighttime operation, and expensive replacement work. The best Solar Powered Crosswalk Warning Lights are not simply bright; they remain visible, dependable, and suitable for the real crossing environment.
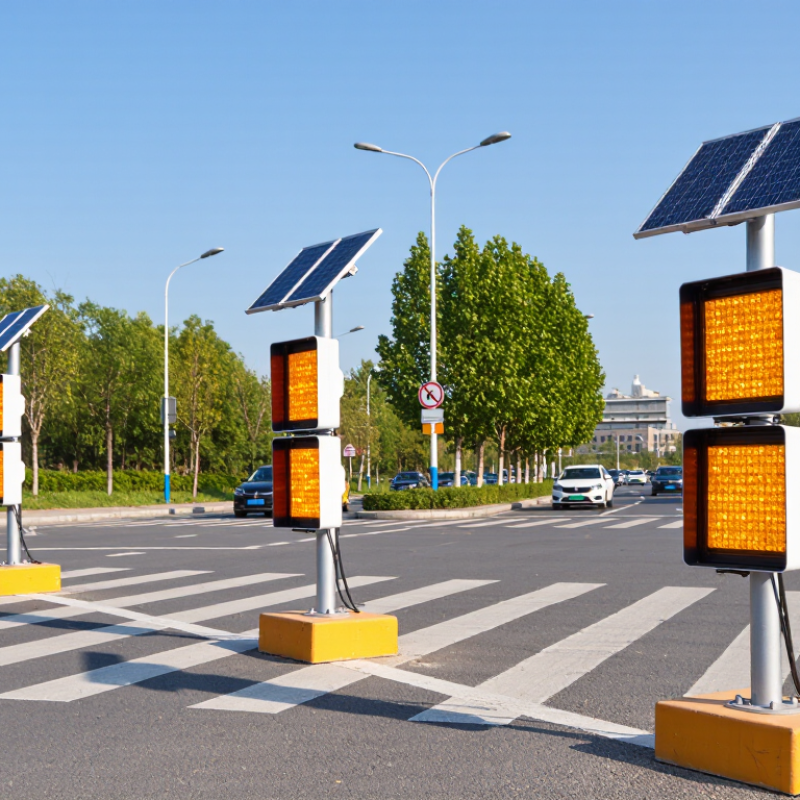
Solar-powered crosswalk warning lights do more than flash at drivers. They make a pedestrian’s presence visible before a vehicle reaches the crossing. That matters because NHTSA recorded 7,522 pedestrian deaths in the United States in 2022, the highest number in decades. The FHWA identifies rectangular rapid-flashing beacons as a proven safety countermeasure when used with appropriate signs and markings. Solar power also supports locations without nearby electrical wiring.
Tip 1: Check visibility from the driver’s approach, not only from the sidewalk. Trees, parked vehicles, rain, and low winter sunlight can weaken the warning. Tip 2: Choose lights with automatic dusk activation and reliable battery storage. A dark crossing is a serious failure. Tip 3: Confirm that the equipment follows current MUTCD guidance, including flash patterns, placement, and sign visibility. Standards are not decoration.
Tip 4: Review local crash records and vehicle speeds before installation. A bright beacon cannot fix a poorly located crossing. Tip 5: Ask for measurable visibility and battery test results, not vague marketing claims. Tip 6: Plan inspections after storms, because dirt and snow can cover panels or signs. Tip 7: Include pedestrian feedback during evaluation. Engineers may miss uncomfortable details, such as glare, confusing activation buttons, or a long waiting time. FHWA safety guidance supports combining active warnings with clear markings, but field conditions still require judgment. The imperfect part is maintenance; even good equipment becomes unreliable when nobody checks it.
7 Tips for Choosing Solar Powered Crosswalk Warning Lights
Match Light Performance to Road and Pedestrian Conditions
Tip 1: Measure the crossing width and traffic speed before selecting light intensity. A quiet neighborhood street needs less output than a wide, fast road. Tip 2: Check daytime visibility under direct sunlight. Some lights appear bright at dusk but fade against a clear afternoon sky. Tip 3: Choose a flash pattern that attracts attention without confusing drivers. Alternating flashes often create stronger recognition than constant illumination.
Tip 4: Study pedestrian behavior near the crossing. Children, older adults, and wheelchair users may need longer warning times. Tip 5: Review winter sunlight and seasonal shadows. Solar panels can lose useful charging hours when trees or buildings block the sky. Tip 6: Confirm battery performance during cloudy periods. A system that works for one bright week may struggle during prolonged rain. Field checks matter. Tip 7: Select mounting heights that drivers can see easily, while keeping the lights clear of branches and road signs.
Reliable installations need more than impressive specifications. Inspect the crossing at sunrise, midday, and night. Record glare, missed flashes, and delayed activation. I have found that real traffic behavior sometimes contradicts the original plan. That is worth admitting. Recheck visibility after installation, especially when road markings change or nearby construction begins. Sodium spray, dust, and frost can also reduce performance faster than expected.
Match light performance to road speed and pedestrian conditions. The chart shows practical minimum detection distances for approaching drivers, calculated using a 2.5-second perception-reaction time and dry-road braking assumptions.
How to use this: Higher-speed roads require longer detection distances and stronger, more visible warning signals. Where pedestrian demand, nighttime activity, glare, rain, or limited sight distance is high, select lights with wider visibility, automatic brightness control, reliable battery reserve, and sufficient solar charging capacity. Confirm final values against local road and traffic regulations.
A solar panel should be sized for the dimmest season, not a bright afternoon in June. Check local winter solar data, panel orientation, and nearby tree or building shadows. NREL’s PVWatts model applies a default 14% system-loss allowance to grid-connected solar estimates. That is a useful warning: real systems lose energy through factors such as soiling, wiring, and shade. But it is not a guaranteed loss figure for a crosswalk beacon.
Match the battery to the light’s actual duty cycle: flashing pattern, operating hours, and radio or sensor loads. Ask how many cloudy days the unit can operate without charging, then confirm the calculation includes cold-weather capacity changes and battery aging. NREL’s 2024 Annual Technology Baseline uses 85% round-trip efficiency as a utility-scale battery benchmark. Small warning-light systems may perform differently, so use the figure for context, not as a product guarantee. Small margins matter.
Also inspect the charge controller and battery enclosure. A large panel cannot compensate for poorly managed charging or a battery exposed to extreme heat. Request the sizing assumptions in writing, including expected daily energy use and reserve capacity. I would question any estimate based only on peak summer sunlight; it may look tidy on paper and still leave a crossing dark after several cloudy days.
Start by viewing the warning lights from the driver’s approach, not directly in front of them. Check visibility in daylight, at dusk, and during rain. A bright daytime demonstration can be misleading. Test at dusk. Look for glare, blocked sightlines, and clear flashing from several vehicle distances. If nearby trees cast seasonal shade, the solar panel may receive less sunlight than it does during installation.
Durability matters at the roadside. Check the housing, lens, seals, and mounting hardware for resistance to water, dust, vibration, and temperature changes. Ask how the battery performs after cloudy days and whether it can be replaced. Small details matter. A unit may look sturdy but still need frequent cleaning if road spray quickly covers its lens or panel.
Review the controls before choosing a model. Confirm how flash patterns, operating hours, and low-battery alerts are set, and whether settings can be checked without opening a sealed enclosure. Then measure the installation site: pole diameter, available panel exposure, cable route, and clearance from pedestrians or maintenance equipment. Follow the supplied mounting instructions and check that the structure can support the added load. If wiring or controls seem unclear, pause and get qualified technical guidance; guessing can leave the system unreliable.
| Tip | What to Check | Practical Evaluation | Why It Matters |
|---|---|---|---|
| 1. Assess visibility at the crossing | LED intensity, flash pattern, lens color, viewing angles, and visibility in daylight, darkness, rain, or fog. | Review photometric data and assess the crossing from drivers’ approach paths. Check applicable local traffic-control requirements; visibility needs depend on roadway speed, geometry, and background lighting. | Warning lights need to be noticeable in the actual approach conditions without creating distracting glare or confusing signals. |
| 2. Check solar and battery capacity | Panel output, battery capacity, expected daily operating hours, and stated autonomy during low-sun periods. | Ask for sizing assumptions that account for the site’s seasonal sunlight, operating schedule, and local weather. Compare stated backup time with the agency’s requirements. | Insufficient solar generation or storage can reduce operation after several cloudy days or during seasons with shorter daylight. |
| 3. Verify weather and impact resistance | Enclosure ingress-protection rating, corrosion resistance, UV-resistant materials, and operating-temperature range. | Look for documented test ratings. IP65 or IP66 can be useful screening references for dust and water protection, but confirm suitability for the site and applicable specifications. | Rain, dust, temperature extremes, vibration, and corrosive environments can affect service life and reliable operation. |
| 4. Review controls and operating modes | Activation method, dusk-to-dawn or scheduled operation, flash settings, diagnostics, and optional remote monitoring. | Confirm that the control method matches the crossing design, and check whether settings can be tested or maintained safely. Verify that any pedestrian-activated features meet local requirements. | Suitable controls can make operation more consistent and help maintenance staff identify faults or adjust schedules. |
| 5. Confirm mounting and installation requirements | Pole or post compatibility, mounting hardware, panel orientation, cable routing, foundation needs, and installation clearances. | Check the installation drawings against the site. Account for hemisphere, panel tilt, nearby shade, roadside clear zones, accessibility, and any required permits or utility checks. | Incorrect placement can limit sunlight, obstruct the warning, create roadside hazards, or complicate future maintenance. |
| 6. Check standards and documentation | Applicable traffic-control standards, electrical and structural documentation, photometric data, and installation instructions. | Ask the road authority or engineer which current local and national requirements apply. Confirm that the proposed equipment and placement are approved for the intended use. | Requirements vary by jurisdiction and crossing type; documentation helps verify that the installation is appropriate and compliant. |
| 7. Compare maintenance and lifecycle needs | Battery replacement interval, service access, spare-part availability, warranty terms, and inspection guidance. | Compare the documented service intervals and replacement procedures. Include labor, battery replacement, cleaning, and inspection in the lifecycle cost estimate. | Purchase price alone does not show the long-term cost or effort required to keep warning lights operating reliably. |
A solar crosswalk light can look compliant in a product sheet and still fail a site’s needs. Compare its output, flash pattern, visibility distance, and operating schedule with the requirements set by the responsible road authority. Ask for test reports and installation instructions, not just a general claim of compliance. Check the details. Pole height, approach speed, tree cover, and road curvature can all affect what drivers see.
Maintenance shapes the real cost. Dust, snow, and leaves can reduce panel charging, while shade may leave batteries short after several cloudy days. Ask how often panels, connections, batteries, and warning devices need inspection. Confirm whether replacement parts are readily available and whether maintenance requires lane closures or specialist equipment. Small costs add up. A low purchase price may mean little if crews must revisit the site often.
Compare total ownership costs over a realistic service period, including equipment, foundations, installation, inspections, battery replacement, and disposal. Use local labor rates and seasonal sunlight estimates; manufacturer assumptions may not match a shaded winter intersection. One easy mistake is treating battery life as a fixed number. Temperature, discharge depth, and charging conditions can change it. Request warranty terms and clarify what labor they exclude. Then compare the solar option with a grid-connected alternative using the same traffic, visibility, and maintenance assumptions.
They alert drivers before vehicles reach the crossing. A bright warning can make pedestrians visible earlier. But lighting alone cannot fix every dangerous location.
View the lights from the driver’s approach, not only from the sidewalk. Test them in daylight, dusk, rain, and low winter sunlight. Check several distances. Trees, parked cars, glare, and road curves may block the warning.
Seasonal shade can reduce charging. Nearby trees may cast longer shadows in winter. Check the panel’s exposure throughout the year. Cloudy weather can leave the battery short.
Ask how long the battery operates after several cloudy days. Confirm whether it can be replaced safely. Check for automatic dusk activation and low-battery alerts. A dark crossing is a serious failure.
Measure pole diameter, panel clearance, cable routes, and pedestrian space. Confirm that the structure supports the added equipment. Follow the mounting instructions carefully. Guessing here can create unreliable equipment.
Inspect the housing, lens, seals, and mounting hardware. They should resist water, dust, vibration, and temperature changes. Ask whether road spray quickly covers the lens. Small cleaning problems become expensive over time.
Compare the flash pattern, output, placement, and operating schedule with local requirements. Check current roadway guidance and sign visibility. Request test reports and installation instructions. A product sheet may not reflect real site conditions.
Include equipment, foundations, installation, inspections, batteries, repairs, and disposal. Use local labor rates and seasonal sunlight estimates. Compare solar and grid-connected options using identical assumptions. The cheaper purchase may not be cheaper later.
Pedestrians may notice glare, confusing buttons, or long waiting times. Engineers can miss uncomfortable details. Collect feedback after installation. The result may still need improvement.
Choosing the right Solar Powered Crosswalk Warning Lights is essential for improving pedestrian safety and helping drivers recognize crossing areas in time. Start by assessing the road layout, traffic volume, crossing distance, weather conditions, and pedestrian activity. Light intensity, flash patterns, viewing angles, and operating schedules should match the location so the system remains noticeable without creating unnecessary distraction.
A reliable system also depends on efficient solar panels, sufficient battery capacity, and dependable energy storage for nighttime and cloudy-day operation. Buyers should examine weather resistance, structural durability, visibility, control options, and installation requirements before making a decision. It is equally important to confirm that the equipment meets applicable safety and electrical standards, while considering maintenance access, replacement needs, expected service life, and total ownership costs. By comparing performance, reliability, installation complexity, and long-term expenses, communities can select a practical warning-light solution that supports safer and more consistent pedestrian crossings.